Tags

Spokesmodel Shelby approves.
This project came out of an internal dialogue that went something like this:
Me: I have all these fluffy, bulky fleece scraps left over after this winter’s orgy of fleece sewing projects. They’re spilling out of their bin and I swear they’re multiplying in there and what am I going to do with them?
Me: I mean, I have all these cotton scraps, too, but they’re so much easier to use up because you can put them in scrap quilts . . . .
Me: HEY WAIT A MINUTE
And so began the googling. Is there such a thing as a fleece scrap quilt? I’d never heard of any way of using pieced fleece in a quilt except for rag quilts, and I didn’t want to have big lumpy seams in whatever I wound up making. I eventually found this post, which suggests overlapping the edges and zigzagging. Perfect! I decided to try this technique out on a cushion for the window sill in my sewing room, which is a favorite cat spot for napping. It had a cushion already, but it was pilling and lumpy, so it was time for an upgrade.

That dark pink there is actually from a scrap of sweatshirt fleece that I used fuzzy side out. I just thought the cushion needed some dark pink and I’d used up all my fleece in that color.
I had a little 4″x4″ quilting ruler hanging around, so I decided to cut 4″ squares. It quickly became clear, though, that I needed to cut some smaller sizes to use up my smaller pieces, so I also cut 2″x4″ rectangles.
Sewing them together proved trickier than expected, however, because my crappy old sewing machine was just DETERMINED to eat that fleece at the start of every seam. EVERY. SINGLE. SEAM. It was a wrestling match the whole way through the piecing. I’m looking at the picture above and I’m amazed that it looks as nice as it does, considering the fleece munching that was happening. One big reason for that is that I made sure that when I overlapped the strips, the edge with all the messiness was UNDER the other strip. (It occurs to me now that as you get more experience and skill with sewing, one of the most important things you learn is how to compensate for–and cover up–all your mistakes.)
The cushion is reversible, with mostly pink, purple, and black on one side, and more of a mix on the other.

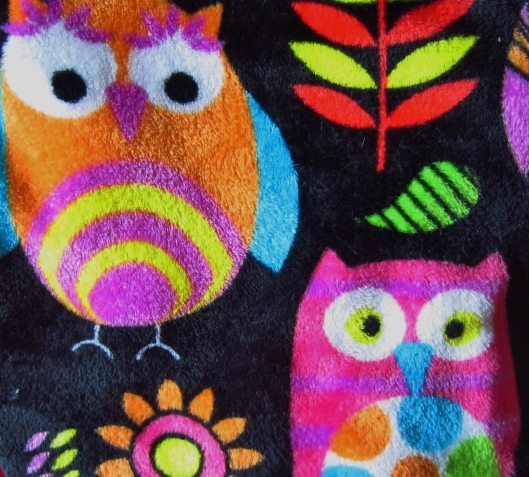
I’ve got most of my blue and orange on this side, including some really fun scraps that I didn’t have much of. See the sun and the spaceship on the left?
I used some of my larger batting scraps for the cushioning, then I tacked the layers together by hand along the long seams. For binding, I cut 2″ strips of black fleece, sewed it (right sides together) to one side of the cushion, then folded it over and sewed it down to the other side. To my surprise, my sewing machine didn’t give me any trouble with that part, even though I didn’t trim the batting from the seam allowance, as I wanted the binding to help secure it in place.
And I’m happy to report the cushion has been a hit!

This was already a favorite nap spot for Pooh, but he’s been spending a lot more time here since I made this cushion for him. Shelby moves around more, but she’s also in this window frequently.
But wait–there’s also this!

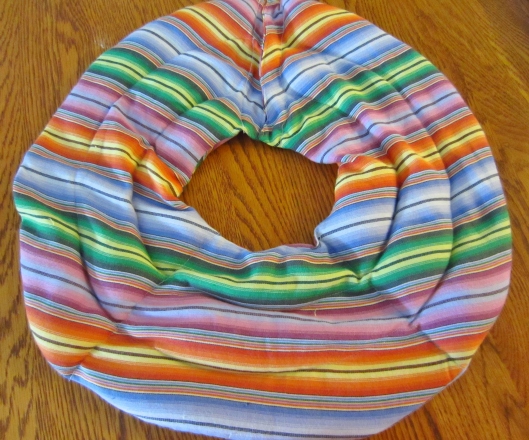
I also made a cat bed, based on this tutorial.

So that’s where that 4″ square ruler went.
Another project to use up fleece scraps, this was supposed to be for Pooh because I finally put our artificial Xmas tree and tree skirt away.

I put away the ornaments and the rest of it early in January (I love Xmas stuff, but having it around always makes my allergies worse), but Pooh LOVES napping under the tree so much that I just couldn’t take it away completely. I left out the bottom section of the tree with the skirt, and he used it for a while, but then seemed to lose interest, so I figured it was time. (I’ve firmly established my crazy cat lady cred here, haven’t I? Yep, I thought so.)
I didn’t have a big enough piece of fleece for this, so I used purple for the top, and bright blue (which I had to piece) for the bottom. I would have liked to use something a bit more fun, but it’s for the living room, and the person I live with is somewhat more conservative in his tastes. 😦

Here’s the bottom.
The tutorial tells you to use stuffing to fill this, which I didn’t have a lot of (and I didn’t want to get trapped yet again in the Fiberfill Vortex, where you buy another bag to finish your project, but then you have half a bag left, but it isn’t enough for your next project, so then you buy another bag and so on and so on). I do have batting scraps, though, so I used several circles of batting for the center and sewed another ring of stitching to secure it. I tore up my smallest scraps and used those–and the last of my fiberfill YAY–to fill the outer ring.
Now, according to the Sewing Blogger Code, this is the part where I’m supposed to say that it isn’t as lumpy as it looks because that’s just an illusion caused by the camera or sun spots or something. However, the truth is that it is just exactly as lumpy as it looks; I don’t think I’ve ever stuffed anything that didn’t turn out lumpy, which is one of several excellent reasons that I don’t make stuffed animals or things like that.
So far, Shelby has been the only one interested in this. I had to hand sew the opening shut with her actually napping in the bed; I tried to lift her out of it, but she told me off with an outraged squeak, and I gave in and let her stay. Anybody who has cats knows getting them to like and use an offered cat bed is a highly risky enterprise, so I’ll be happy if it gets any use at all. Hell, I’m happy anyway because I used up a fair bit of fleece and about half my stash of batting scraps. So I’m calling it a win already.
STH